The Interactive Map module is an interactive touch card on which different points of interest can be indicated.
The ‘map’ can be a geographical map, but can also just be an image of different products; a landscape; a production process;… You can place touch points on this image. This is often visualized by means of a pin. When you press this pin, you will see a pop-up with text and assets (video and/or photo).
When you click on “Interactive Map” in the module menu, you will get an overview of all existing Interactive Map modules, as well as a button to add an Interactive Map module.
Example1: https://xd.adobe.com/view/af2e81ef-9837-4246-93b2-b1fe859efa43-fa7d/?fullscreen
Example2: https://xd.adobe.com/view/803a3053-5bde-4080-bc15-87f230c17ddc-d569/?fullscreen
Delete an interactive map module: the entire module is deleted
Duplicate an interactive map module: the entire module, including all its contents, is duplicated
Cancel an interactive map module: all changes that were made before saving can be cancelled by clicking the cancel button
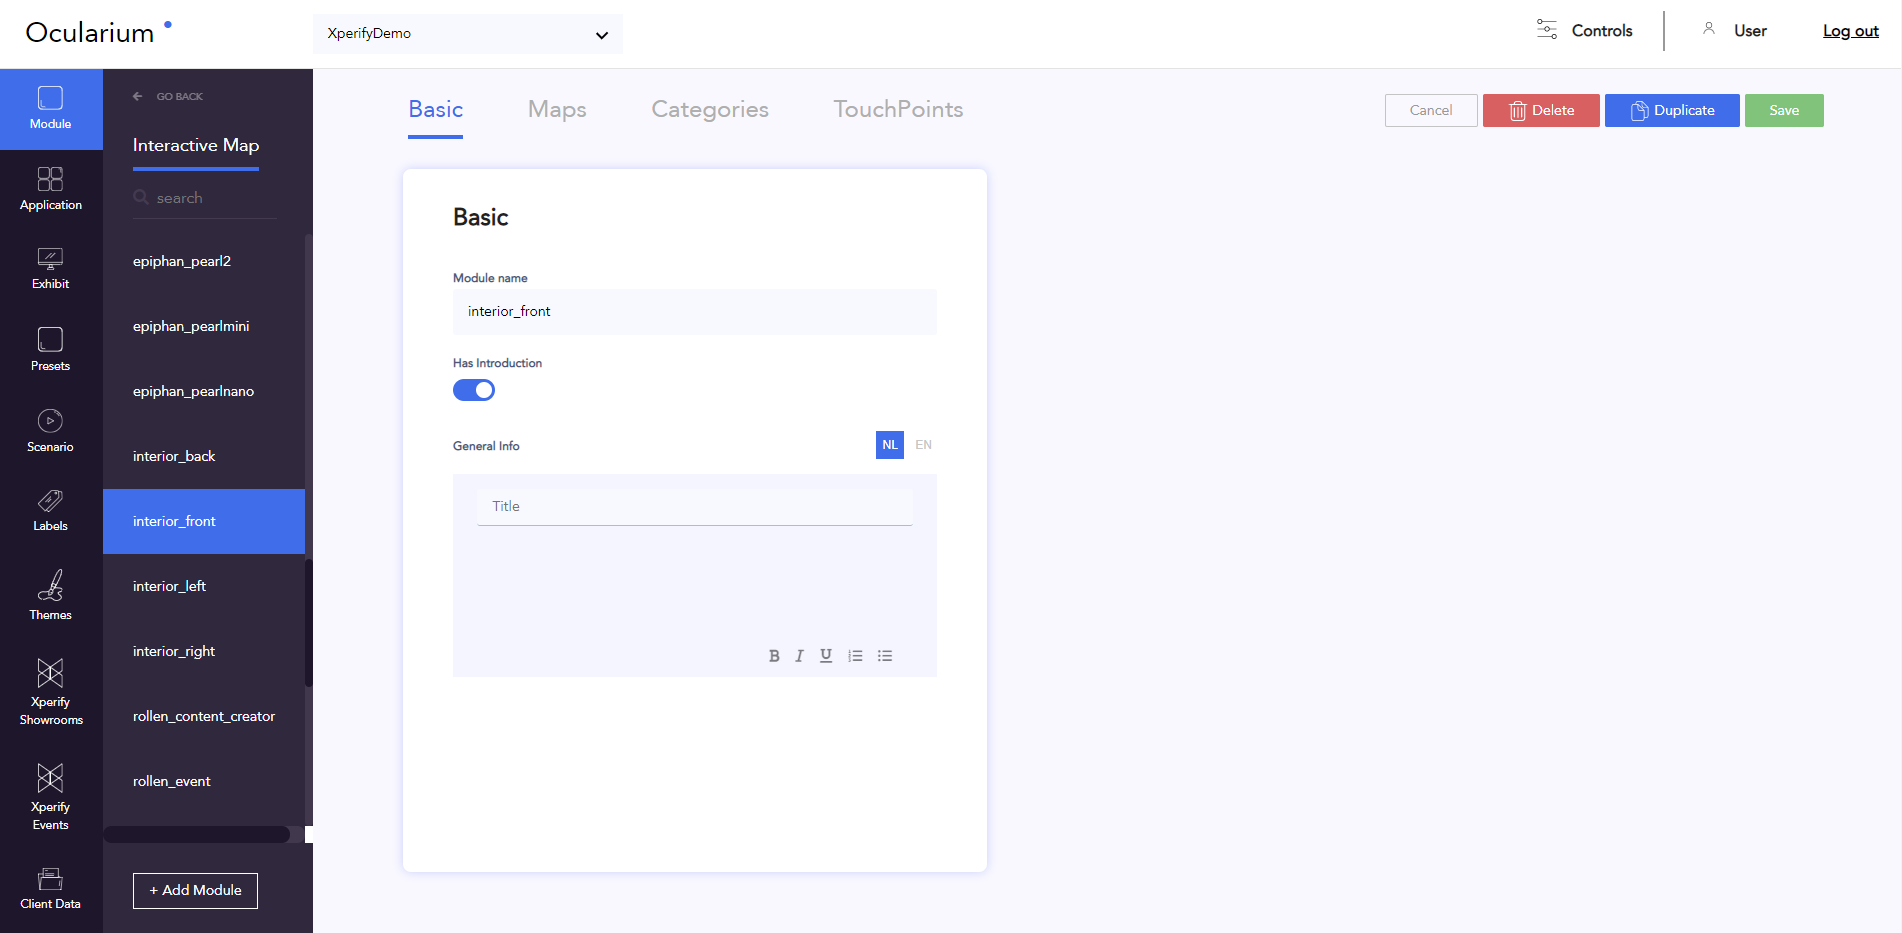
Module name: internal work name
Has introduction: determines whether the module should show an introductory pop-up
If ‘has introduction’ is activated, you can add text and title in any language:
Title
Text
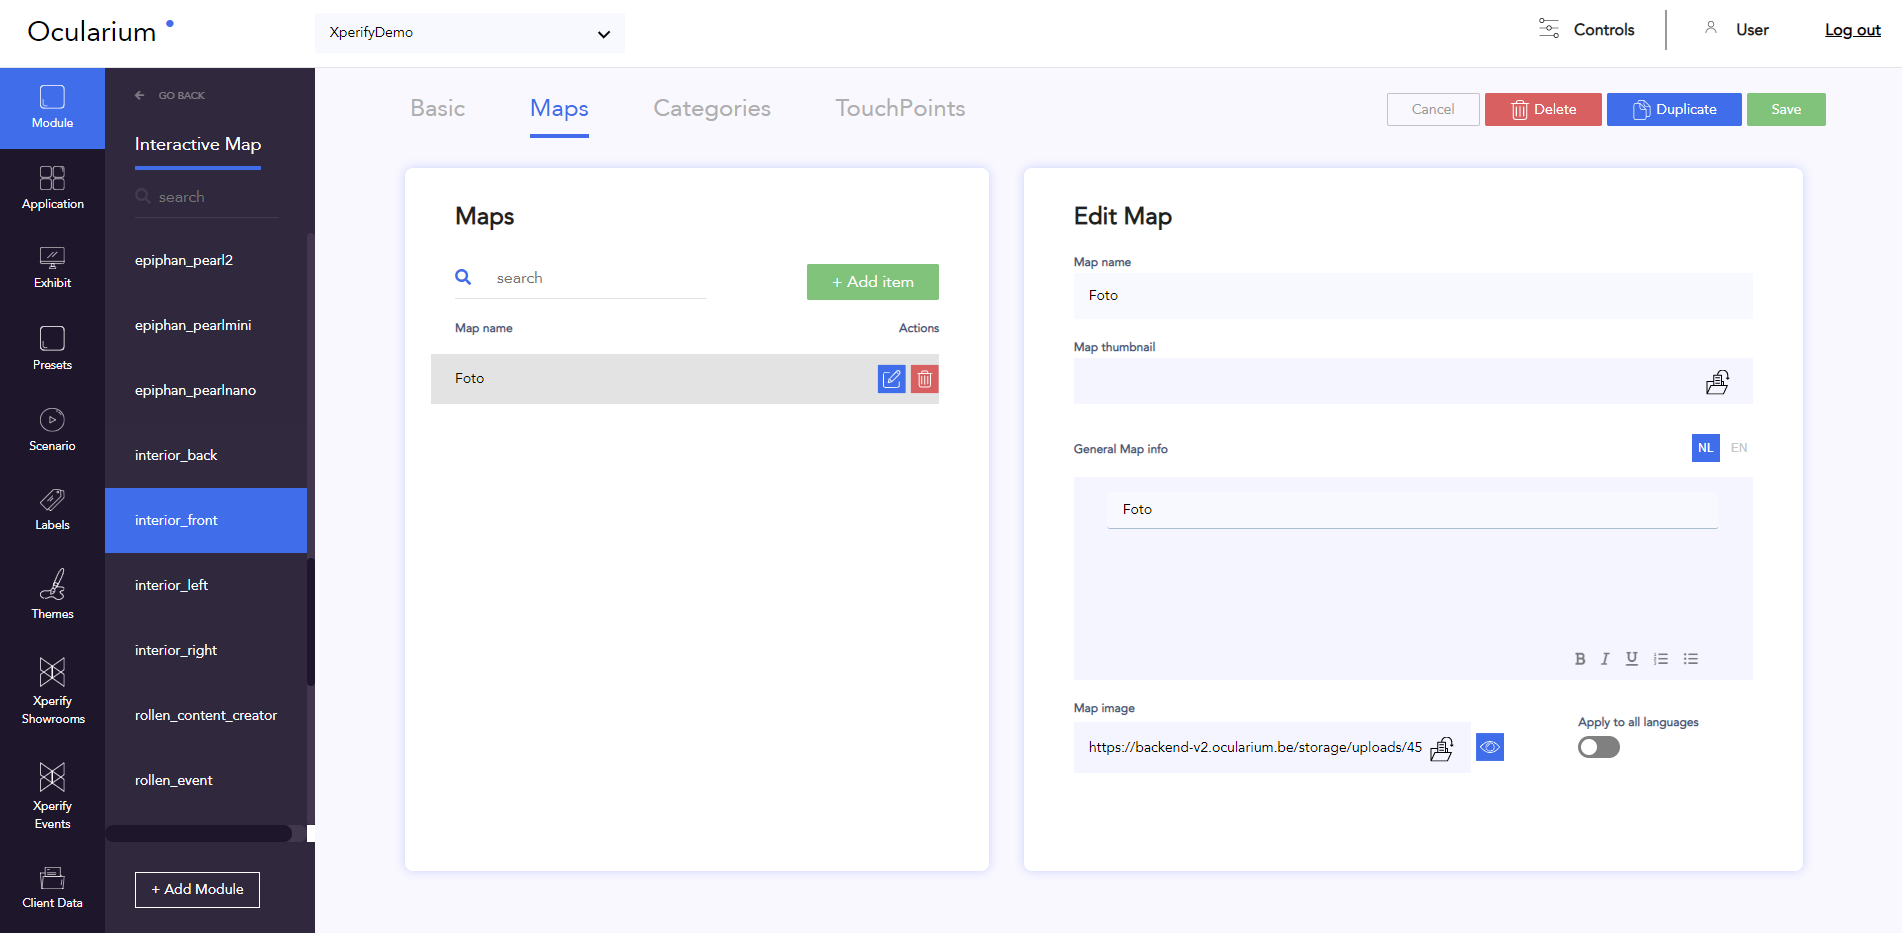
It is possible to add multiple maps within an Interactive Map module, each of which has its own information. A list of all created maps can be seen on the left-hand side and the details of the selected map on the right-hand side .
You can determine the following for the selected folder:
Map name: internal name
Map thumbnail: miniature image that is used for navigation between different maps
Tip: Optimal resolution: 94px x 94px
General map info: can be set per language
Map: background, the map itself. This can also be set per language. If it is the same for every language, activate ‘apply to all languages’ after you have uploaded your photo or video and before saving.
image: .jpg or .png
video: .mp4. The video is playing in loop with audio.
Default off: the system will automatically fit the uploaded photo or video into screen
One: the system will use the original file size and add scroll functionalities
screen size = asset size → no scroll
screen width < asset width → horizontal scroll
screen height < asset height → vertical scroll
screen width and height < asset width and height → horizontal and vertical scroll
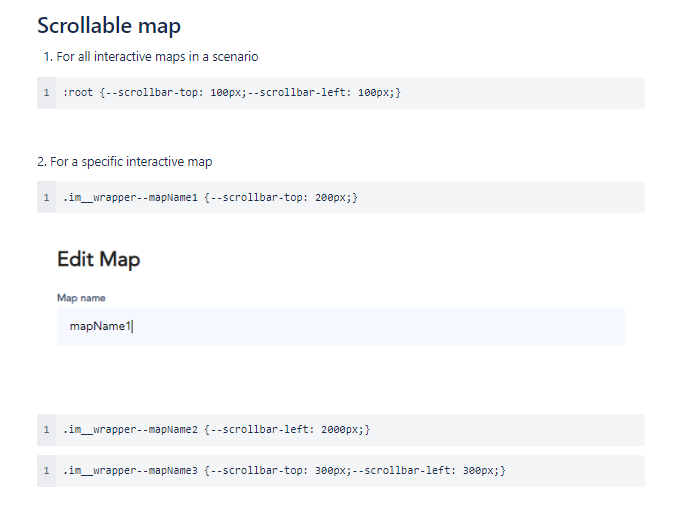
The starting point of the charged asset is always top left. To add this, you can use some CSS rules
https://ocular.atlassian.net/l/c/uJb0uhcS
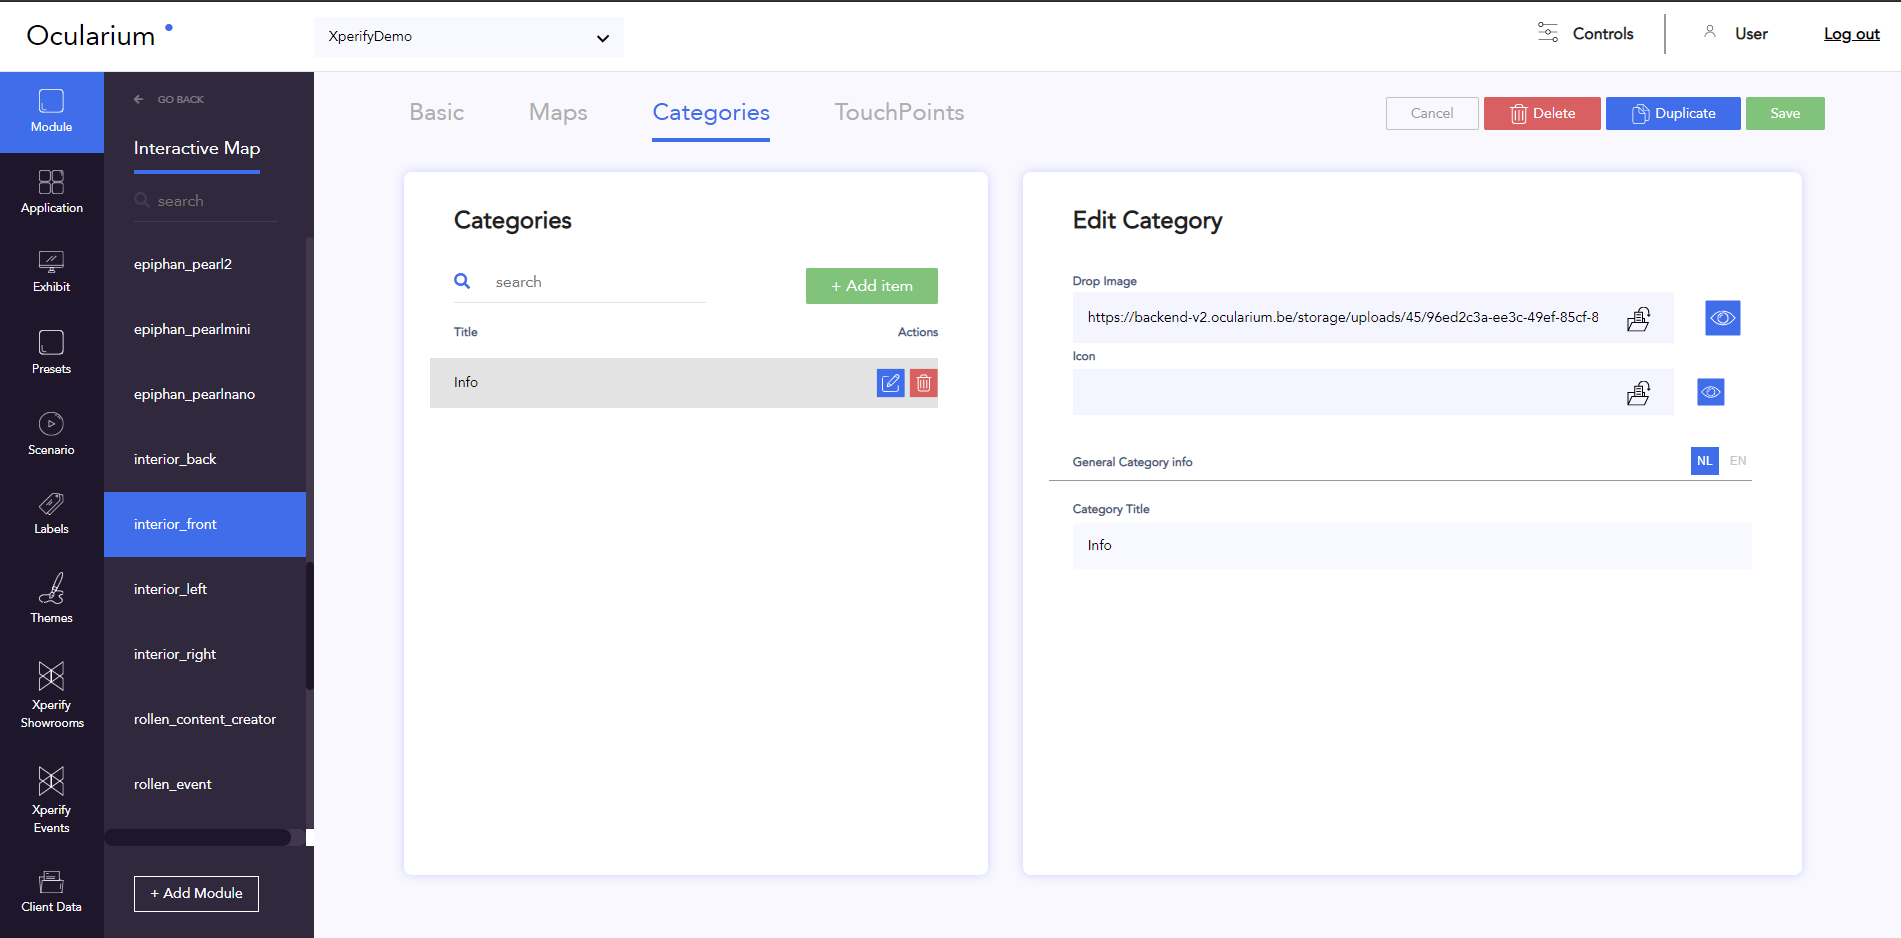
Categories are a solution to group your touch points. If all touch points fall under 1 category, you are also required to create 1 category.
A list of all created categories can be seen on the left-hand side and the details of the selected category on the right-hand side . You can determine the following per category:
Drop Image: determines the indicator of the touch point itself.
Tip: Optimal resolution: 90px x 150px
Icon: an image that will be placed in the drop image
Tip: Optimal resolution: depends on the drop image’s size and shape
Category Title: set a title per language
Tip: you can also upload a transparent image at ‘drop image’. This makes parts of your background image clickable, without a ‘typical drop image’ appearing on it.
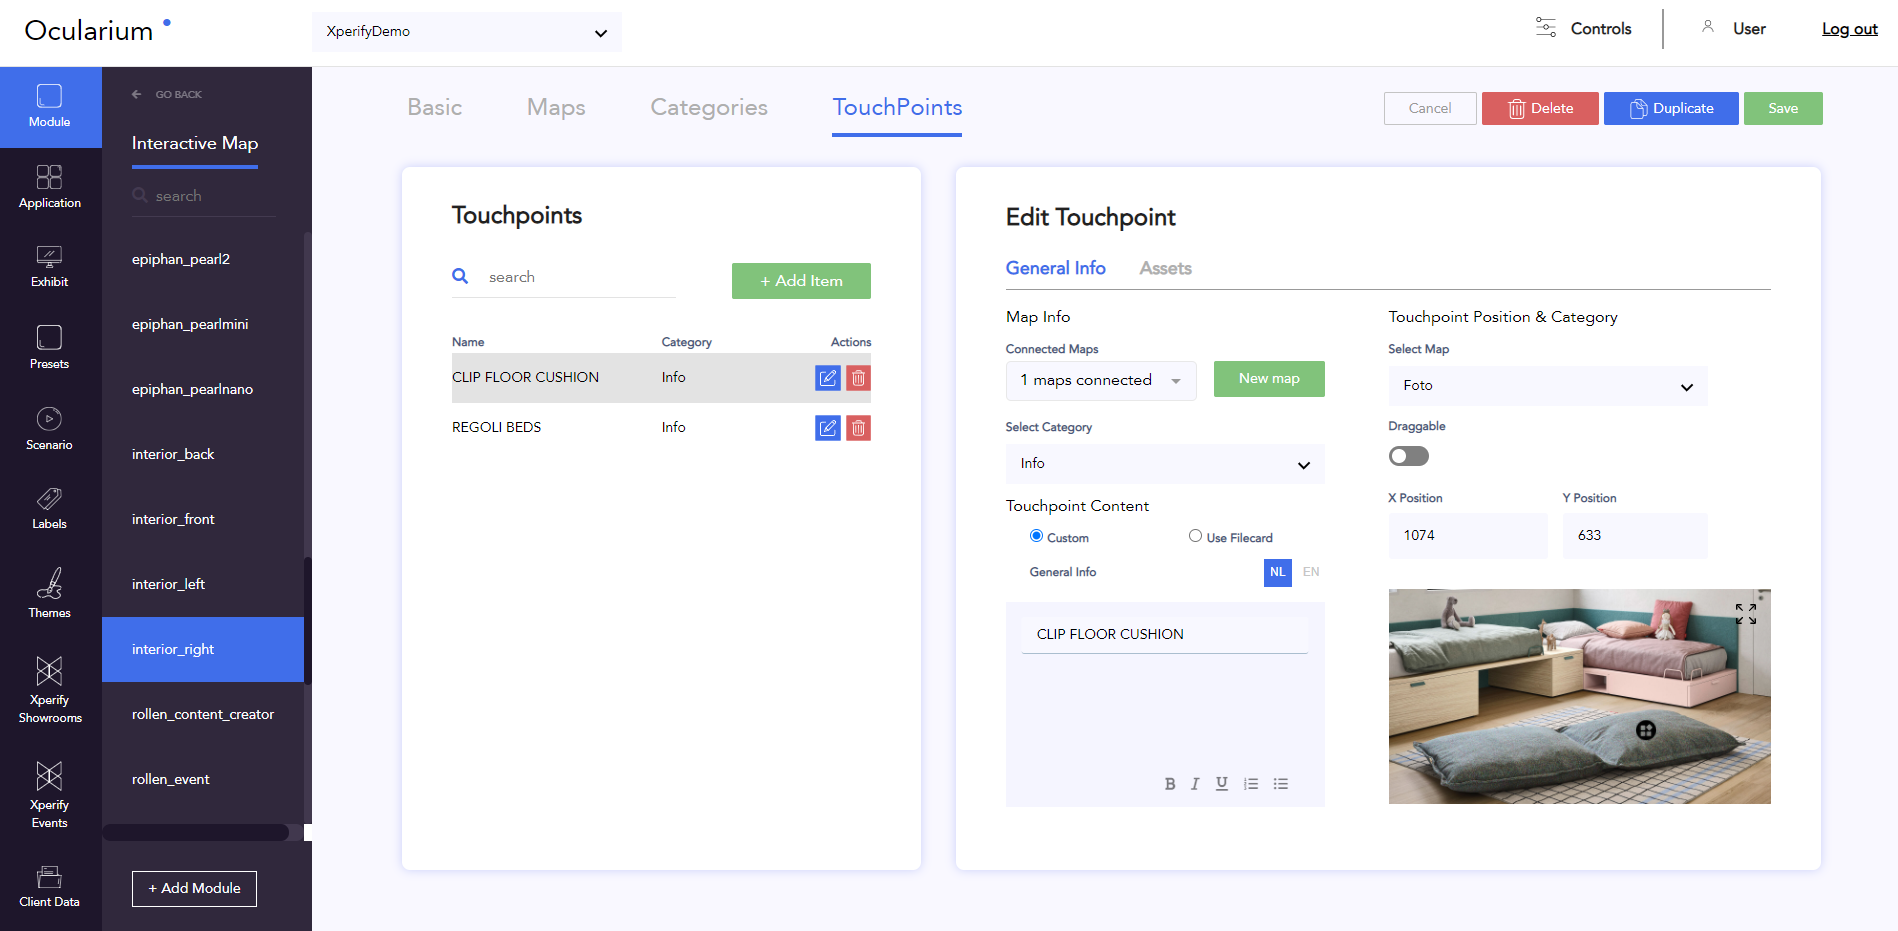
You can determine where the touch points will be visible and what their content is within the tab “Touch points”.
A list of all created touch points can be found on the left-hand side; the details for the selected touch point on the right-hand side.
Connected maps: here you can determine on which map(s) the touch point will be visible
Select Category: here you can assign a category within which the touch point falls
Touch Point Content
Option 1: title and textual information is entered here.
You can add a link in the text field to an external website
Option 2: you can opt to use a file card
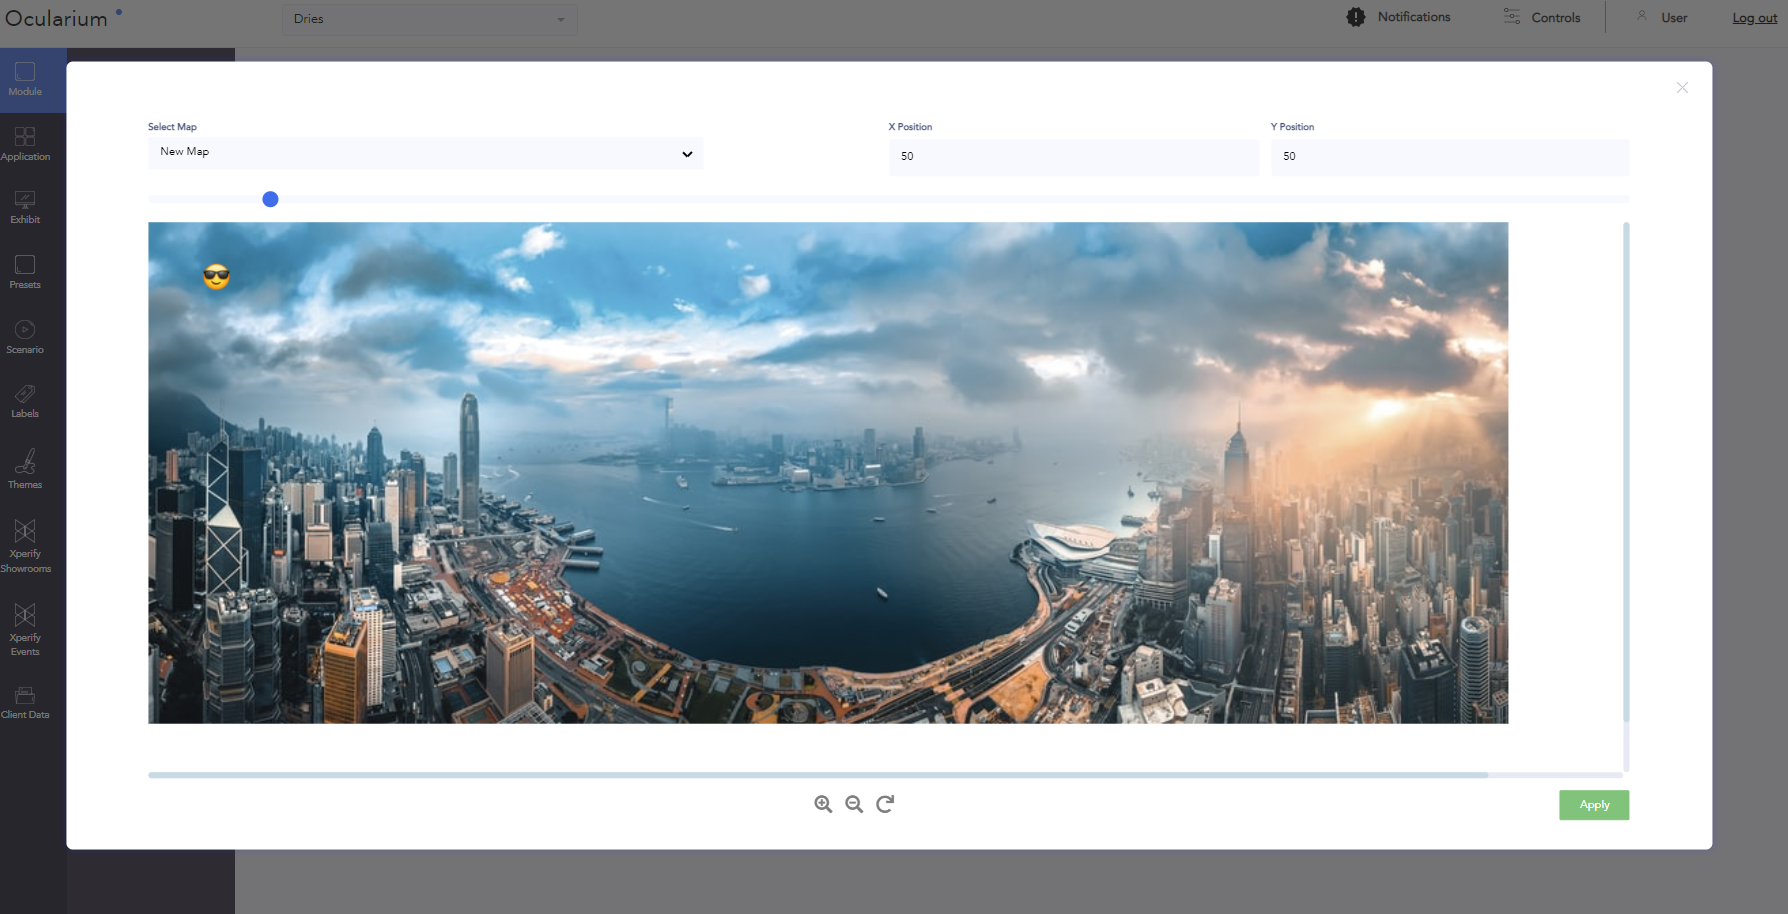
Touch point Position: here you determine the position of the touch point per linked map and select the map on which you want to place your point. This must be done per map
the default starting position of your touch points is always top left. Drag the touch point with your cursor to the desired position, or enter the x,y coordinates
Use the ‘expand’ button on your map to position it in a larger view
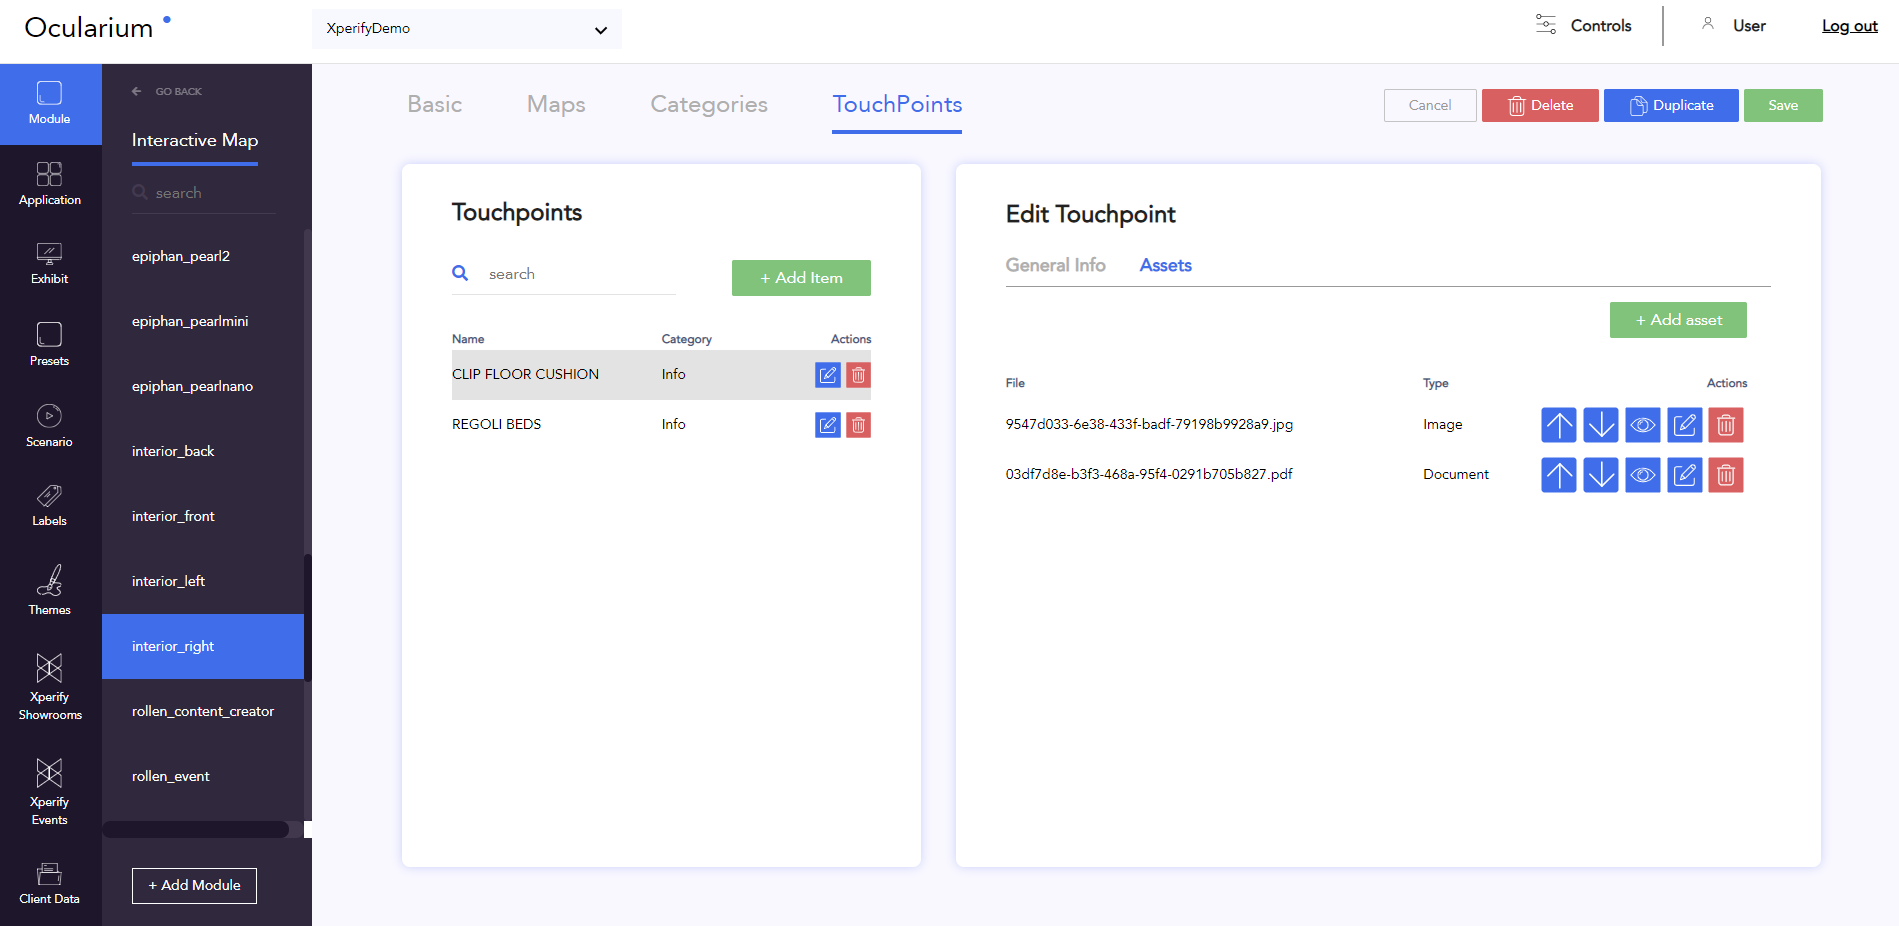
You can add your media to your file card here. The following file types are possible:
jpg
png
gif
mp4
wav
Add a new asset:
Upload the asset from your computer
If the asset can be the same for all languages, press ‘apply asset to all languages’
Press ‘add to list’; only then will your photo or photos be added to the media carousel
You can still change the order of the assets via the arrows
Tip: Optimal resolution: according to ratio 16:9
Tip: ‘apply to all languages’ will only work after you have uploaded a photo and before you press save
Remark: If you chose a file card as touch point content, the assets added here will not be visible.